
I recently needed to setup a Dahua camera to use a Microsoft Office 365 account for sending notification emails. It was a bit of a challenge to figure out what the problem was, but it does work at the time of this update (February 7, 2023).
I expect these settings to be the same for Dahua, IC Realtime, Amcrest, Hikvision, Clearview, and other camera manufacturers. Probably even the same for printers because most of this is configuration of the Office 365 tennant.
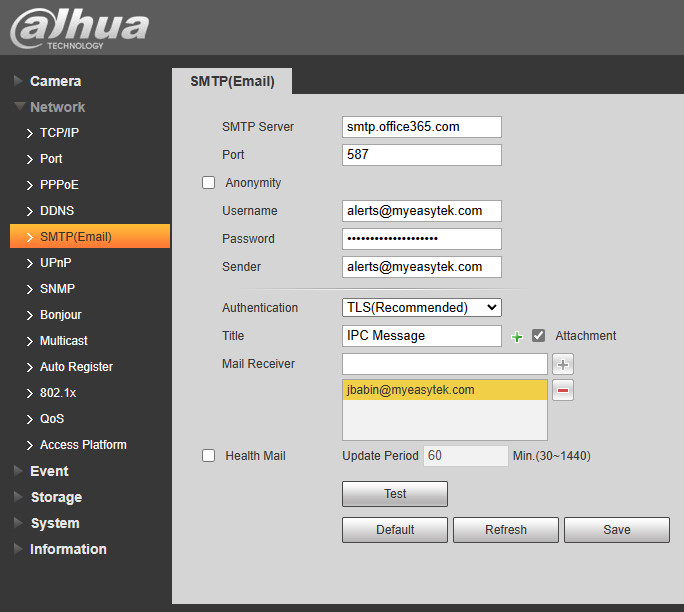
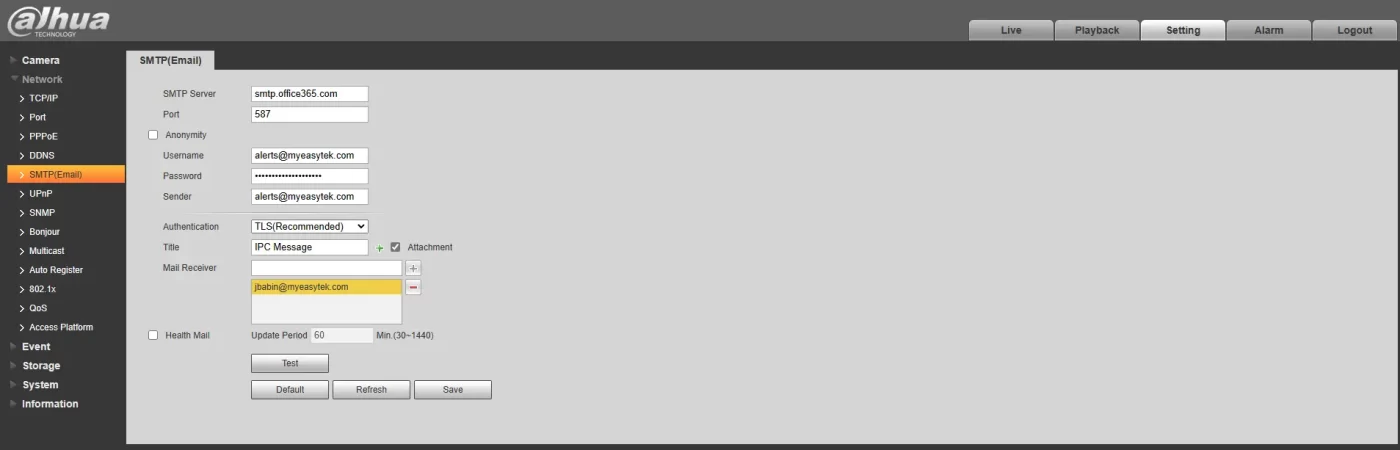
IP Camera: Email (SMTP) Settings
Screenshot of the settings is at the top of the page.
For the smtp server, use smtp.office365.com, and port 587.
For the username, enter the email address as you would use to login to outlook webmail or other Microsoft services. In my example, I do have a Business Basic license assigned to the account. I was unable to test it with a shared mailbox.
For sender, I used the same name as the username because I assumed it had a greater chance to avoid the spam filters.
Choose TLS for authentication. The “Title” field will affect the subject of the email. Add a mail receiver, which is the email address you want it to be sent to.
If you check “Health Mail” it will aggregate notifications over a period of time, and send them all at once.
Press “Save” before trying to test. If the settings are correct, and your Office 365 account has the correct settings, it will say “Succeed” when you hit “test.”
Required Office 365 SMTP Settings:
To test this, I actually created a brand now Office 365 tennant so I would know what is the minimum required security deprecations to make the email notifications work.
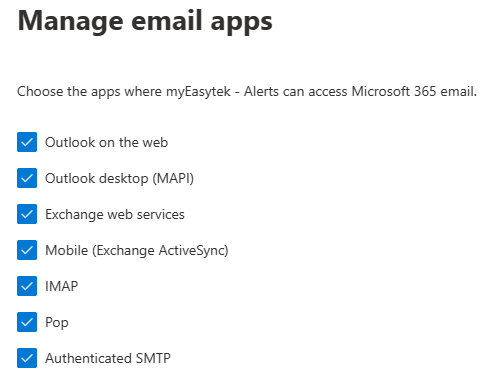
To start, go to the admin portal at https://admin.microsoft.com. On the left pane, click “show all” then “active users.” Select the use, and it’ll open up a pane to the right. On that pane, select “Mail” and “Manage Email Apps.”
If you don’t see any options under “mail” it’s because you have not yet assigned a license to the user. In my test, I did assign a Business Basic license to the mailbox.
Under “manage email apps” you will see the settings in the screen shot below. The only setting that matters is “Authenticated SMTP.”
The last step is to disable “Security Default.”
To do this, you will have to login at https://aad.portal.azure.com.
On the left pane click on “Azure Active Directory” then on the next left pane that opens up scroll down just a little and click “Properties.” Find “Manage Security Defaults” to open the tab on the right, and then select “No.”
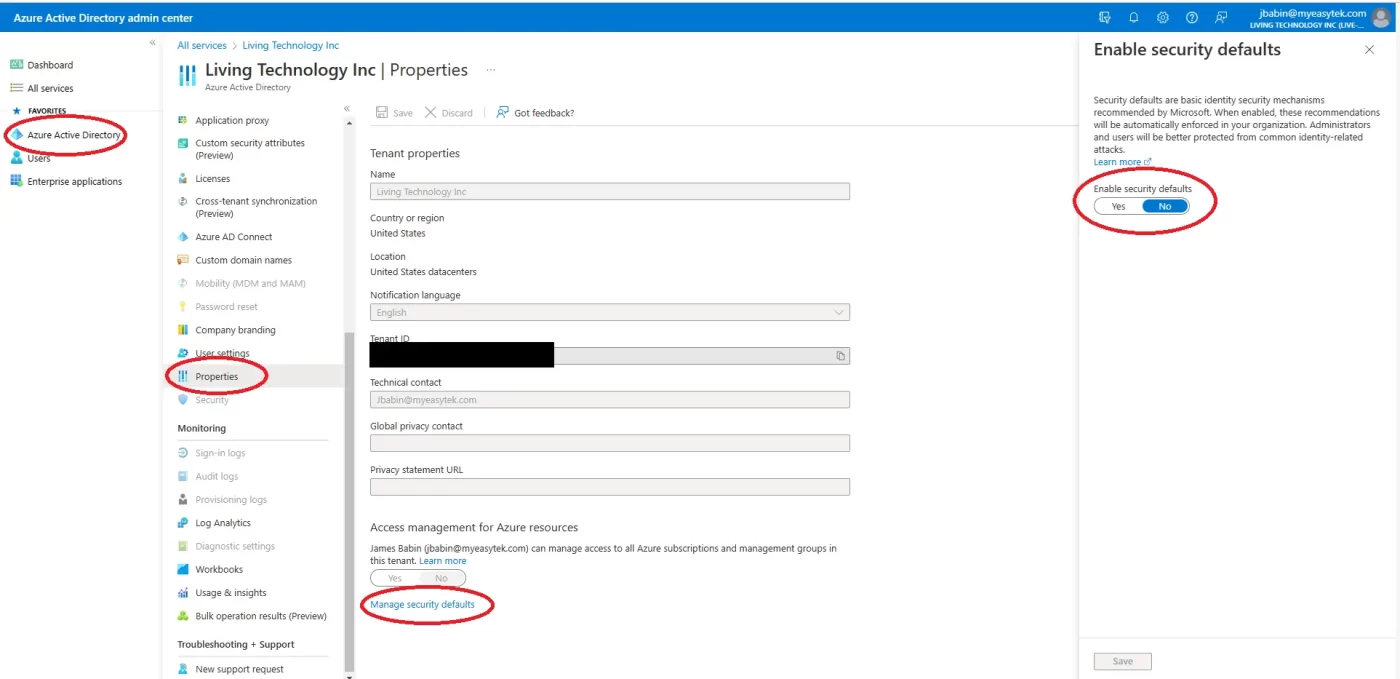
Wait about 30 minutes and try to test the email settings again, it should succeed.
If it does not succeed, make sure you have disabled “Per User MFA” for the account, or that it is in a “trusted location.”
Security Concerns
Now that you’ve disabled security defaults, it’s essential that at a minimum you enable per use MFA for all accounts. Ideally though, you would use conditional access policies with an Azure AD P1 license.

I can’t thank you enough!!
Hi, is this working in 2025? Will it work with per-user MFA “enforced”? Thanks in advance.
I tested and works as a charm! Thank you!