

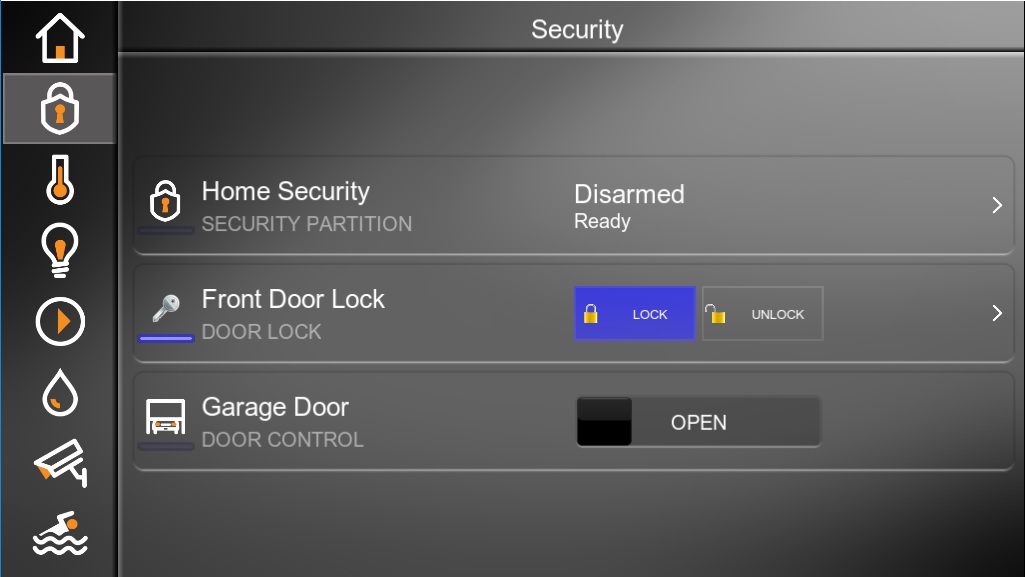
As part of our Elan Home Systems overview, we’ll take a deeper dive into the security sub system of the Elan g! home automation system interface. To recap the discussion from the more general walk through, on the main page you see three devices available. The first is the home security system, which is communication from the security panel. The second is control and status view of the front door lock. The third is control and status view of the garage door.
There is no more information to be learned about the garage door as it is simply open or closed, but let’s take a look at the screenshots after selecting the “Home Security” and “Door locks” tabs.
Home Security System Integration

After having selected the “Home Security” tab this is the next screen we see. On the left half of the main section we see all of the zones that are currently faulted. Right now, the garage door is open so it’s popping up in the list. If the front door is opened, we would see a similar text added to this display that would also say “FRONT DOOR” with the same available options to bypass and fault. If “Bypass” is selected, that particular zone would be disabled in the security system until it is no longer bypassed. As a security measure, the disabling of the bypass feature is available in system programming.
On the top of the page we see the text “ready to arm” meaning that the security system could be armed as is, in this case even with the garage door opened because it has been bypassed. If the front door were opened the text would read “not ready to arm” meaning that the front door would have to be closed prior to arming.
On the right side of the screen we see “no system faults.” This is the area where the Elan system would tell us if there were any pending issues with the alarm, like “loss of a/c power” or “communication loss” etc. Typically, this reads “no system faults” 90% of the time.
On the bottom part of the screen there are buttons for disarm, stay, and away. These buttons correspond to the arming modes of your security panel. Since the disarm button is blue, we know that the security system is currently not armed in any mode. Had we armed the system in stay mode (with instant triggers) then the disarm button would become black again and the stay button would illuminate blue. We can also use these buttons to arm and disarm the security panel, but a disarm would pop up a numbers pad because it requires the security pin.
On the top right we have three icons. Currently, we are looking at the main security page, but we could also select the “zone” menu or the “history” menu.
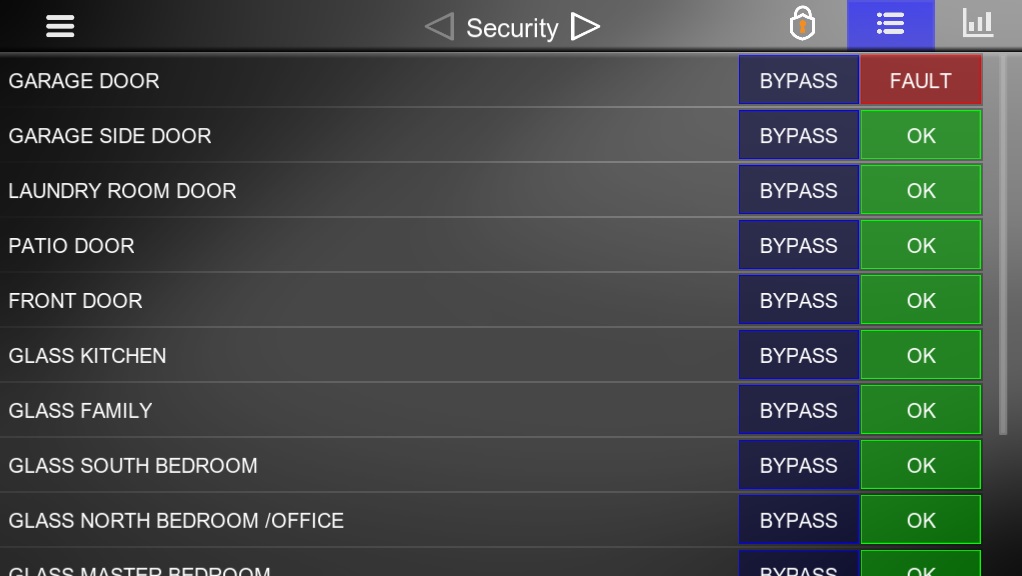
The zone menu (above) lists all of the zones currently installed in the security system. It also lets you know if they are bypassed or faulted.
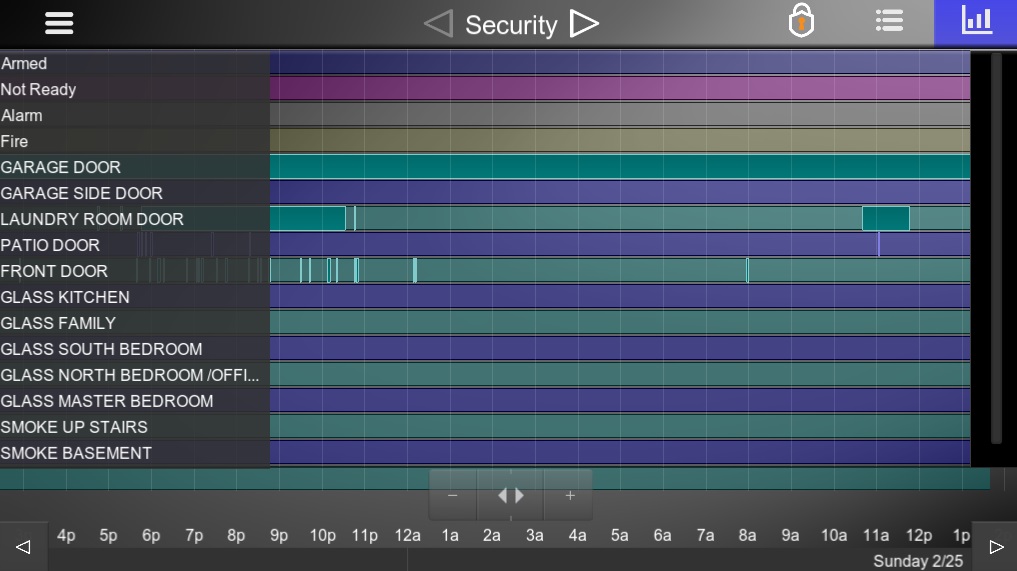
The “history” icon will allow you to drill down into the past couple days and see which sensors were tripped and when. This is mostly important when an alarm is tripped so that you can go back and see which sensor faulted. You can also see when at what time the security system was armed and disarmed.
Integarting Z-Wave Door Locks with Elan
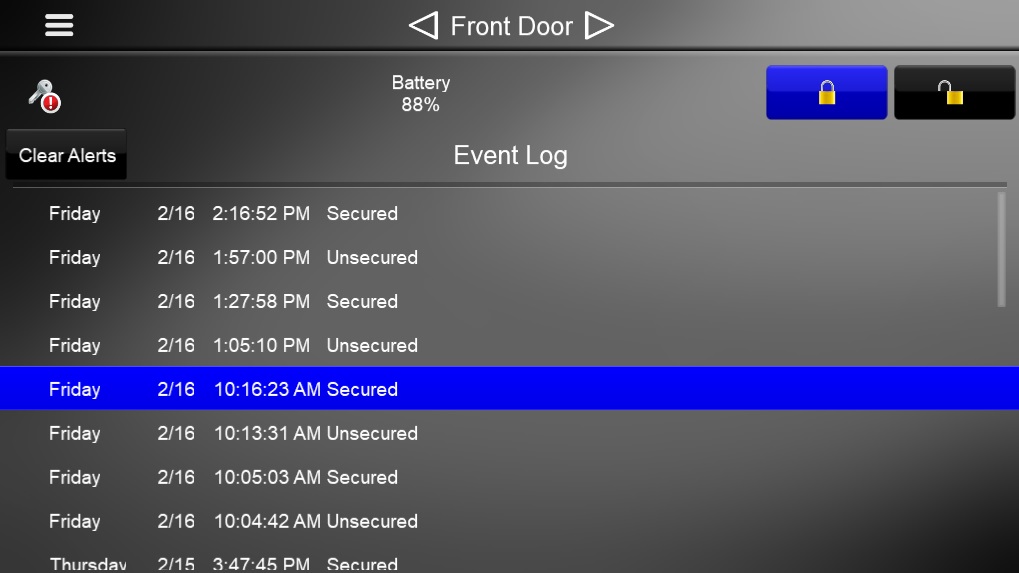
The page for door locks following the main screen again offers control of the door locks but also gives you some the history of the lock. You can see when it was locked and unlocked by reading “Secured” or “Unsecured.” When the Elan system is used to operate the lock it will say “Unsecured by (user).” Where “user” is the profile connected to whatever phone, tablet, or touch panel was used to operate it. At the top of the page we get a battery indicator for the door lock itself.
