Audio, DIY Prewire
Low Voltage Wiring – Whole Home Audio and Surround Sound
Mar
This is the second post in a comprehensive series on low voltage wiring and structured cabling. We will address how to prewire your home for whole home audio and surround sound systems.
Purchase customized plans for a DIY Home Automation prewire.
Rooms Without Volume Controls
In a whole home audio system, all of the speaker wire should be pulled from the equipment room to each individual speaker. In general, I recommend using either 16/2 or 16/4 oxygen free 65 strand speaker wire. When buying speaker wire, the first of those numbers refers to the thickness of the wire, the lower the number the thinner the wire. The second number refers to the number of conductors within the outer jacket. If you have the option to purchase spool in box as opposed to nest in box, do it. Below is a picture of 16/4 speaker wire.

If you elect to pull 16/2 speaker wire, then you must pull an individual cable to from the equipment rack to each speaker. This is the simplest and most straight forward method, but will cost a little bit more and will require a little some extra effort in terms of wire pulling and labeling.
If you elect to pull 16/4 speaker cable, then one cable is pulled to each PAIR of speakers. Pull the wire in such a fashion so that it is available at each speaker location in the pair. Then, at the first speaker, pull through enough extra cable so that you can make a loop with about 6′ of slack coiled inside of it. Then, and this is important, label the wire going INTO the coil loop that is coming FROM the equipment room “Amp”. Then do the same on the the wire going OUT of the coil loop TO the next speaker and label it SPEAKER. Knowing the direction will be important when it comes time to trim. Make sure that at the second speaker in the pair there is also an additional 6′ of slack beyond what it needed to just reach the speaker location.
Rooms With Volume Controls
Pull a single 16/4 (or two 16/2) speaker cable to each volume control from the equipment rack. Then, from the volume control pull either one 16/4 cable to each pair of speaker as described above, or pull one 16/2 cable to each individual speaker. In general, it is recommended that volume controls are not used because most of the time people prefer to control the volume with mobile devices or in-wall touch panels. Adding volume controls on top of this creates a very frustrating system because the interface control of the volume will always be limited to the current maximum setting of the analog volume control.
Instead of using volume controls, a touch panel or small keypad (with no LCD) can be placed in the room for quick access. We will cover prewiring these types of devices in the 4th post of this series.
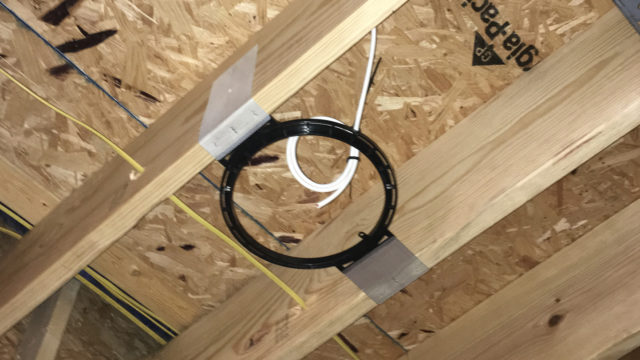
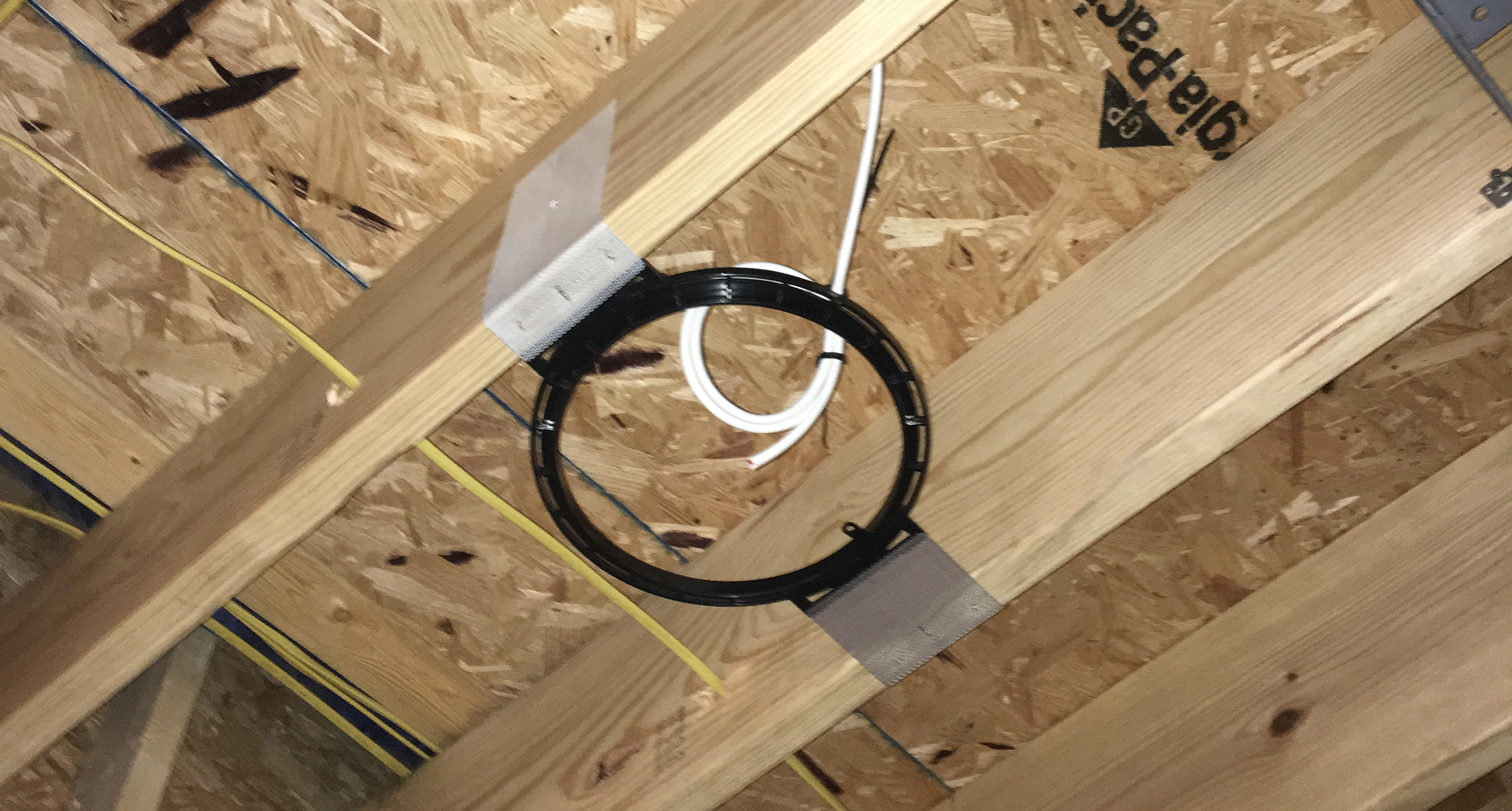
Installing the Speaker Brackets
Install the speaker brackets so that the raised flange is facing in towards the room. This will give the drywaller an edge to cut against when he cuts the hole for the speaker. Then, tie the speaker wire to the speaker bracket in such a way that it is behind the bracket all together. It’s even better if you can tie the wire to a low voltage staple in a manner that allows you to retrieve the wire through the hole after drywall is installed, but is actually at least several inches above the speaker bracket. The first picture in this post is a good example of what it should look like.
Wiring for Surround Sound
Surround sound systems are wired the same way as whole home audio systems, with the head end being the location of the surround sound receiver. The only exception would be if there is an active floor standing subwoofer, which most of the time is the case. To wire for an active subwoofer, pull a single coaxial cable (RG-6, RG-59, or mini RGB) from the equipment location to the subwoofer location. Mount a single gang open backed box at outlet height and tie the wire with at least 18″ of slack behind the box.

Hi James
Low voltage contractor Bill Khobani here ,, looking for a simple drag n drop software to up load a builder provided floor plan to add speakers,cameras, WiFi access point,central vac and stuctured cabling similes on. Could you recommend a software program! Thanks
I use the visio plug in for D-Tools.