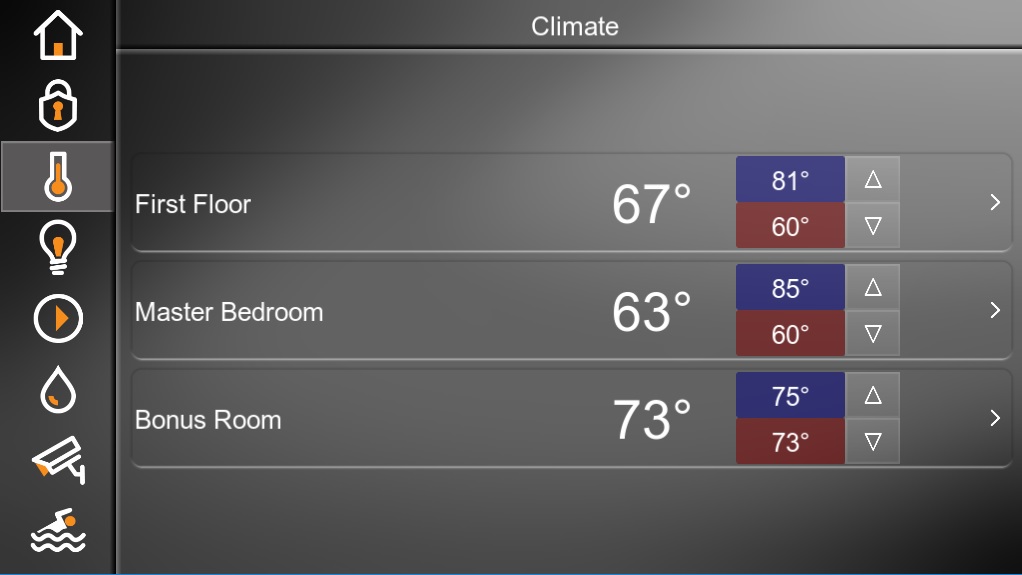
From our general walk through of Elan Home Systems we see this main climate screen and that we can view and edit current temperatures. When you drill down further into the tab the detail is expanded greatly and you can edit heat cool set points, humidity, schedules, and even see a history of your climate control system. In the demo system from where I took the screenshots I was using Aprilaire 8820 Wifi thermostats.
Tempurature Page

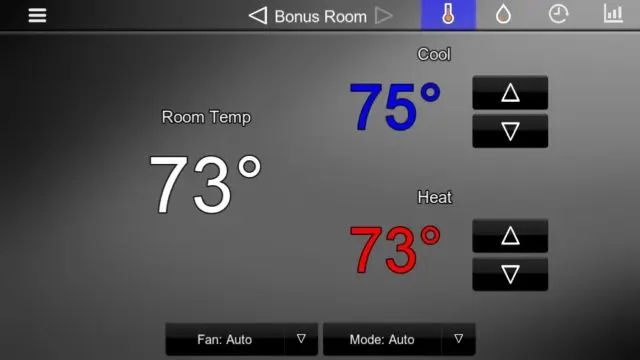
This is the next screen we see after selecting “Bonus Room” out of our climate controlled zones. On this page you see the current room temperature as well as the heat and cool set points on the right. Since this is an auto changeover thermostat and it is in auto mode, the Elan interface is offering us to set a comfort range in which it will heat if the indoor temperature drops below 73 or cool if the indoor temperature raises above 75. It’s currently winter in Chicago, so the chance of the temperature rising above 75 is nothing, and in effect it would operate the same as if it were in “Heat” mode instead of auto.
The two drop down lists at the bottom are for the fan mode and the heat mode. The fan mode offers a selection to keep the furnace fan running continually or to sporadically circulate the air regardless if the heat is on. The next mode refers to the heat mode. If in auto, you’ll see a high and low temperature like in the screenshot. If set to “Heat Only” the cool set point will disappear and it will offer only heat, and the reverse is true if “Cool Only” is selected.
Humidity Page
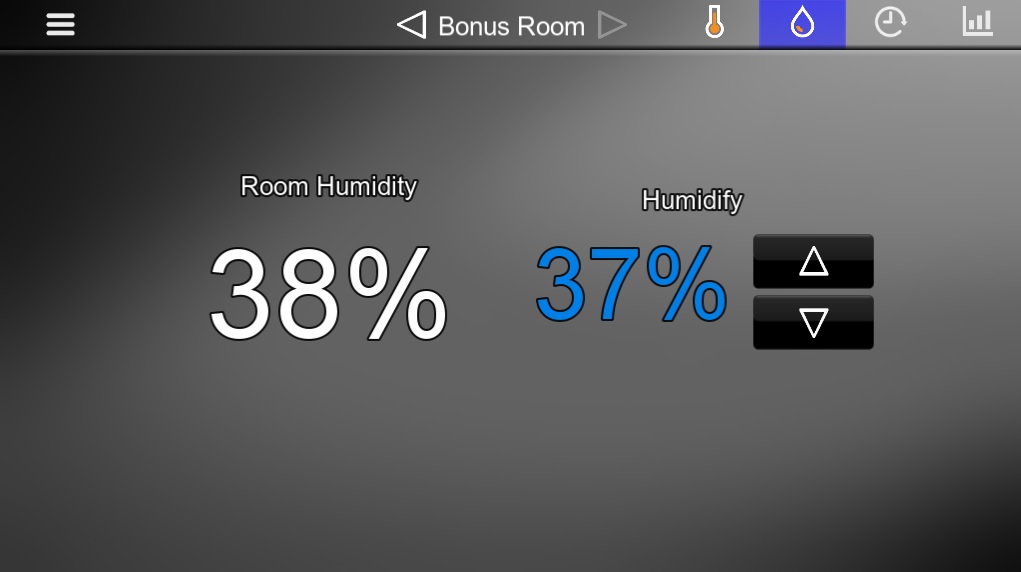
The Aprilaire 8820 WiFi thermostats offer humidity control, which is also available to toggle in the Elan interface. Simply select a humidity set point and the whole home humidifier will run when it drops below the selected level.
Schedule Page
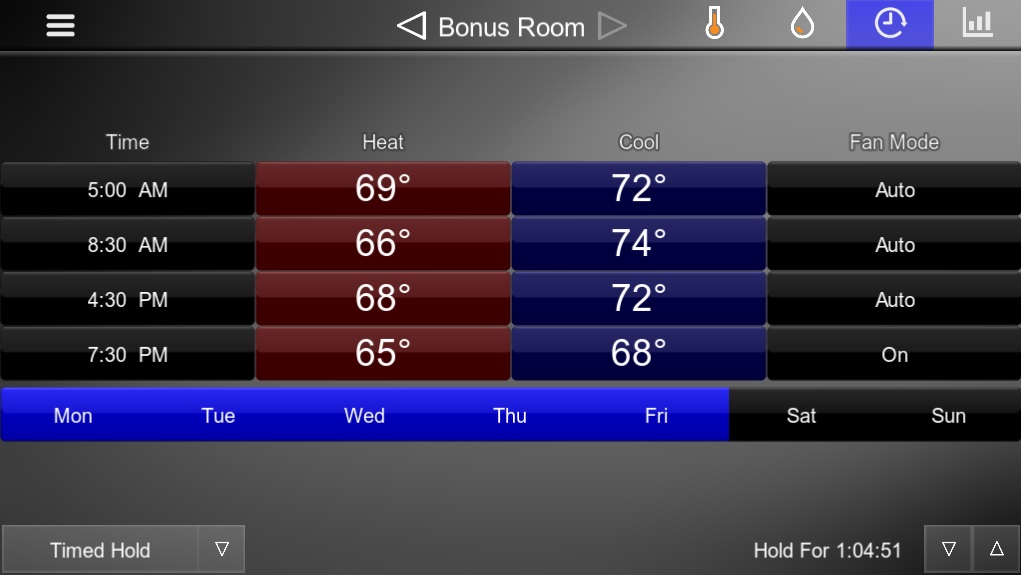
The scheduling page is pretty self explanatory, but this is one of the biggest benefits when integration your clime control system with Elan g!. You can set a different schedule for every day, and it’s far easier doing it from an Elan interface than it is from the thermostat itself. You can also run two different schedules depending on if you are home or away, which I usually base off the arming status of the alarm panel. The home schedule can be set for ultimate comfort, while the away schedule can be set for ultimate efficiency. Also note that the fan mode can also be scheduled.
At the bottom of the screen we see the words “timed hold” and the duration for which is will continue to hold. This is because I am not currently running a schedule because the set point manually changed the temperature. It will stay at the temperature it was manually set to until the timed hold duration expires at which point it will resume the schedule. “Permanent Hold” is another option, but this is generally not recommended because it will not resume running the normal schedule until manually selected. The default “timed hold” is four hours.
Climate Control History
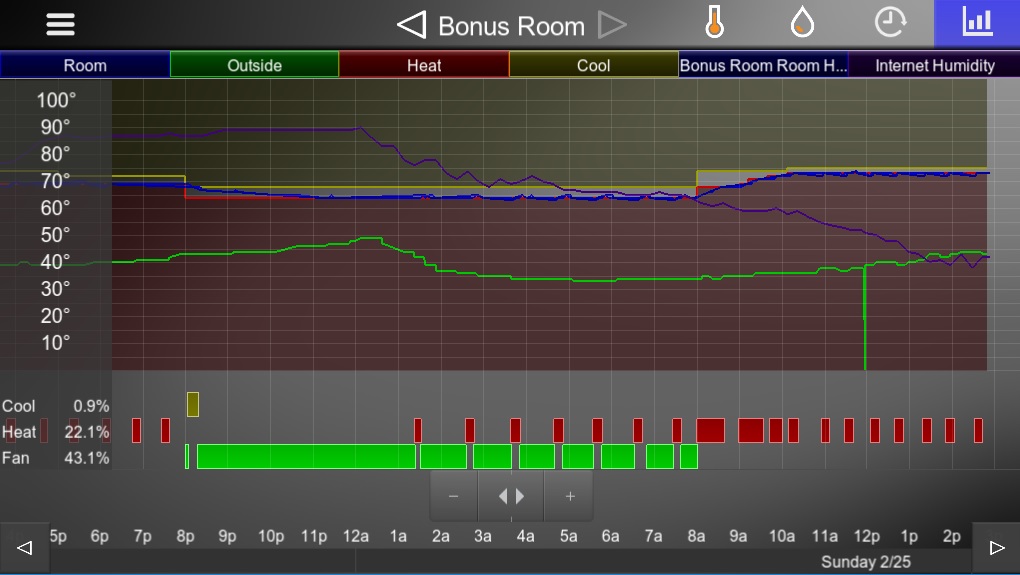
The final page is a history of your system. You can see the room tempurature, the outside tempurature, the heat and cool setpoints, indoor humidity, and outdoor humidity all in one graph. You can also see when the furnace was heating, cooling, or had the fan active. In my example, you can see the fan turned on at 7:30pm and ran without heat until 8am. If you refer back to the schedules, you can see that it was scheduled to do so.
It’s always advised to use the most compatible thermostats. For instance, with Nest and Lutron thermostats, there’s no available heat/cool feedback within the graph. However, with Aprilaire 8820 WiFi thermostats, you’re able to get the feedback for the history view, and/or call automation events against it.
This is a really useful feature if you ever have issues with the heating or cooling of your home. It can help diagnose heating and cooling efficiency.

Great Article! Thank you for sharing this is a very informative post, and looking forward to the latest one